A person wraps a towel around a slippery jar lid. Someone places a sticker over two confusing buttons. A commuter uses a rubber band to keep a small case closed. These workarounds are useful clues about where product design could improve.
Everyday frustrations rarely arrive as complete design briefs. People describe what annoyed them, show how they adapted, or quietly stop using a product. The designer’s job is to understand what sits behind that behavior.
A better product does not necessarily need more features. It may need a clearer opening direction, a more comfortable grip, fewer assembly steps, or feedback that makes an action easier to understand. Useful improvement begins with the problem rather than a predetermined solution.
Watch the Task Before Asking for a Feature
When someone says, “This needs a bigger handle,” that is a proposed solution. The underlying problem might be an uncomfortable grip, insufficient leverage, slippery material, or an awkward operating position.
Observe the complete task where possible. Notice how the person approaches the product, what they hold, which steps interrupt them, and how they recover when something goes wrong.
Context changes the experience. A container that works well on a dry countertop may become difficult to use with wet hands. A label that looks obvious in bright lighting may be overlooked inside a crowded cabinet.
Ask the person to describe what they are trying to achieve. Avoid guiding them toward the improvement you already have in mind.
Turn Complaints into Specific Observations
“The product is inconvenient” is too broad to guide a useful redesign. A stronger observation identifies the user, the task, and the point of difficulty.
For example: “People carrying groceries cannot reliably open the storage bin with one free hand.” This describes a situation without deciding whether the answer is a larger latch, a pedal, or another mechanism.
Separate what you saw from what you inferred. “The participant pulled the latch three times” is an observation. “The participant dislikes the mechanism” requires additional evidence.
Record repeated patterns, but retain unusual cases. A difficulty affecting fewer people may still matter greatly if it prevents them from using the product at all.
Illustrative Example: A Food Container That Is Hard to Open
A user says the lid is “too tight.” Observation reveals a more precise problem: the edge offers little space for fingertips, and the container slides when the person tries to lift the lid.
Simply loosening the closure might compromise spill resistance. A better exploration could include a clearer lifting tab, a more stable base, or an opening sequence that requires less simultaneous gripping.
Write a Problem Statement That Leaves Room to Think
A useful problem statement explains who experiences the difficulty, what they need to accomplish, and why the current experience falls short.
Try this structure: “People in this situation need a way to complete this task because the current approach creates this difficulty.” Keep the language concrete enough that another person can recognize the situation.
Avoid embedding the final design inside the statement. “Users need a touchscreen” closes the search early. “Users need to understand which setting is active” leaves several possible solutions available.
Also define the boundaries. A product intended for occasional home use may face different constraints from one used repeatedly in a shared workplace.
Choose Problems by Impact, Not Just Visibility
Some frustrations are memorable because they look dramatic. Others occur quietly on every use. Compare them using more than the loudness of a complaint.
Consider frequency, severity, the number of affected users, and the consequences of failure. Ask whether people can recover easily or whether the difficulty stops the task entirely.
Workarounds deserve attention too. If people regularly use another object to operate the product, the workaround may reveal effort that a normal satisfaction question would miss.
Keep uncertainty visible. A handful of observations can identify promising issues, but they do not automatically establish how common those issues are across the entire market.
| Question | Why It Helps |
|---|---|
| How often does this occur? | Distinguishes repeated friction from an isolated event. |
| What happens when it fails? | Reveals practical consequences. |
| Who struggles most? | Identifies overlooked needs and contexts. |
| What evidence is missing? | Prevents premature certainty. |
Explore Several Ways to Remove the Friction
Generate alternatives before polishing one concept. You might change the shape, action sequence, material, instructions, feedback, or relationship between components.
Return to the container example. One idea improves finger access. Another keeps the base from sliding. A third changes how the closure releases. Each addresses a different part of the observed difficulty.
Sketching alternatives makes tradeoffs visible. A larger tab may be easier to grasp but more likely to catch on other objects. A softer grip may feel comfortable but complicate cleaning or assembly.
The goal is not to find an idea with no disadvantages. It is to identify a direction whose benefits and compromises fit the intended use.
Make the Next Test Small and Concrete
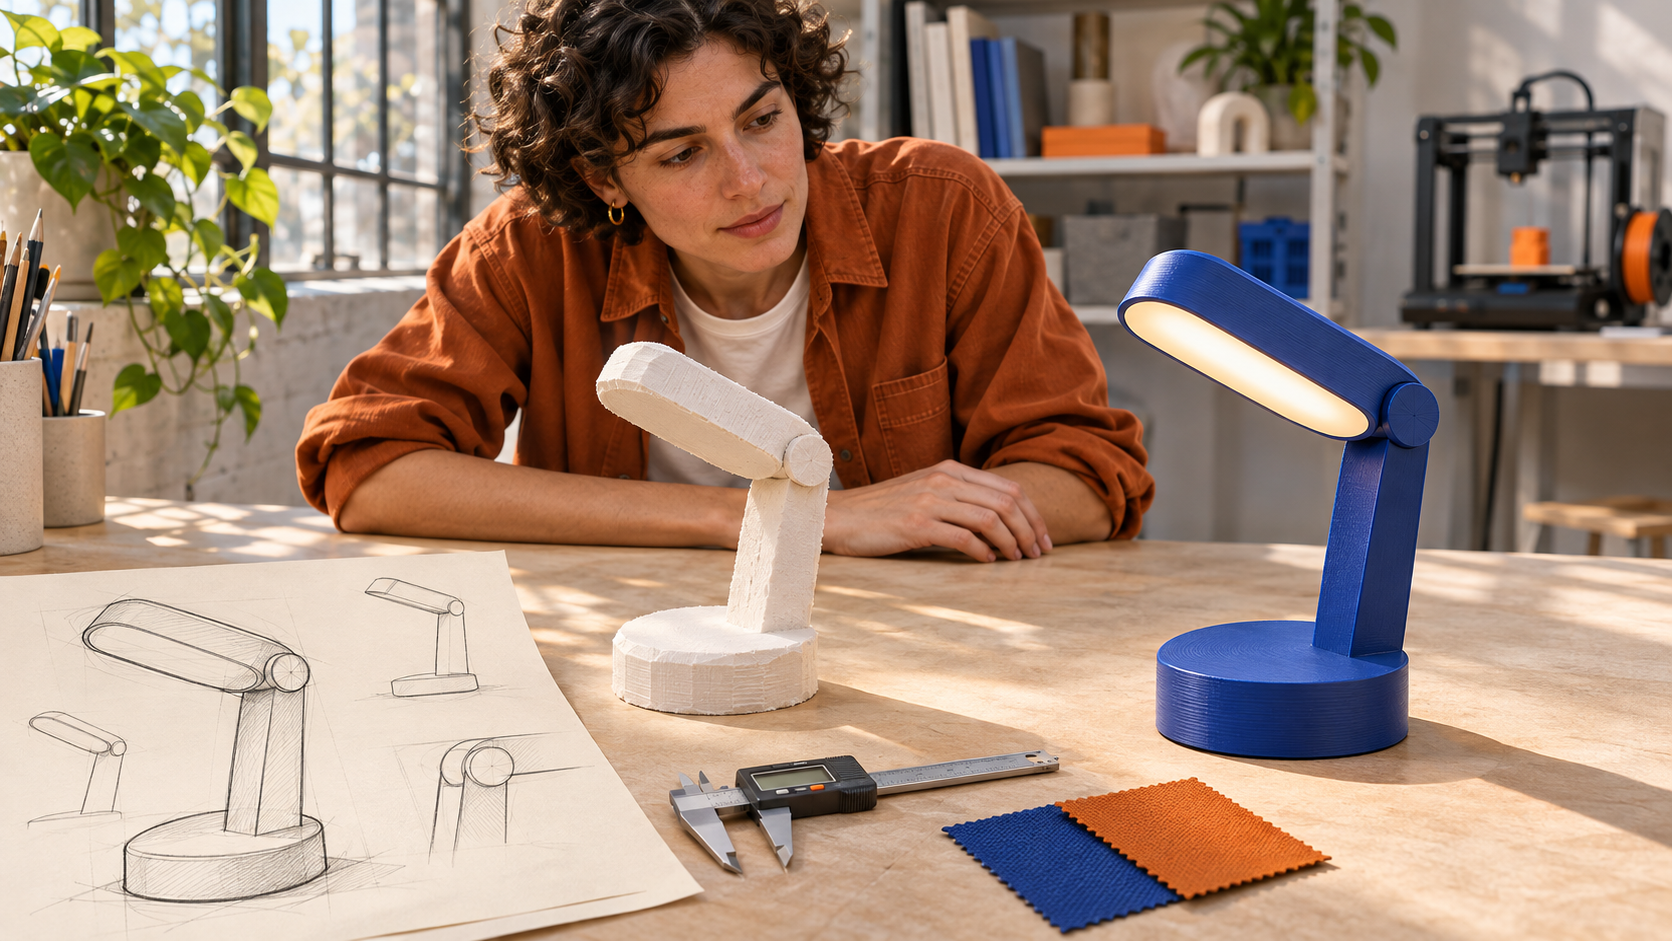
A rough model can answer a narrow question surprisingly well. Cardboard may show whether controls are reachable. Foam may help compare grip shapes. A simple digital mockup may reveal whether labels communicate clearly.
Match the model to the question. A visual rendering cannot prove a latch is comfortable, and a hand-built mechanism cannot establish that production parts will have identical durability.
Give participants realistic tasks rather than demonstrations. “Open this while holding the bag” reveals more than “Here is the new tab; pull it like this.”
Observe the first attempt before offering help. Instructions delivered by the designer can hide weaknesses that an actual owner would encounter alone.
Include People Whose Needs Challenge the Design
Testing only with colleagues can produce a misleadingly smooth result. They may understand the product category, know the project’s intention, or hesitate to criticize it.
Include people who resemble the intended audience and consider relevant differences in hand size, strength, experience, vision, and use environment.
Do not ask one participant to represent every person with a particular characteristic. Look for concrete difficulties and design responses rather than treating a demographic label as a complete explanation.
Better access often begins with ordinary details: readable markings, distinguishable controls, manageable force, and actions that do not demand unnecessary precision.
Measure Improvement Through the Task
“People liked it” is helpful feedback, but it does not establish whether the original problem improved. Define what success means before comparing concepts.
Relevant measures might include successful completion, repeated attempts, errors, help required, or the ability to recover from a mistake. Time can matter, but faster is not always better if accuracy declines.
Ask participants what they expected at confusing moments. Their explanation can reveal a mismatch between the product’s appearance and its behavior.
Compare alternatives under reasonably consistent conditions. If one model receives a detailed explanation and another does not, the results mix design differences with testing differences.
A useful decision rule: Keep changes that address observed difficulties, reconsider changes that create new obstacles, and investigate results you cannot yet explain.
Preserve the Improvement Through Production
A promising prototype can lose its advantage when dimensions, finishes, or assembly methods change. Document which details made the improvement work.
If finger clearance was essential, preserve that space. If a textured area improved orientation, check whether the intended manufacturing process reproduces it consistently.
Review cleaning, maintenance, storage, repair, and disposal alongside the main task. Solving the opening problem should not quietly create a difficult cleaning problem.
Everyday problems become better product designs through a repeatable sequence: observe carefully, describe the difficulty precisely, explore alternatives, test the task, and protect the useful details. The strongest result is a product that makes sense in the user’s hands, not merely in the designer’s presentation.
A prototype is not a miniature promise that your product will succeed. It is a tool for finding out which parts of the idea deserve confidence—and which still need work.
The most useful prototype is often the simplest one that can answer the next important question.
A product concept may look convincing in a sketch and still contain unanswered questions about usability, function, construction, or demand. Moving directly into production turns those uncertainties into expensive commitments.
Prototyping provides a more flexible route. You make selected parts of the idea tangible, test them under suitable conditions, and use the findings to decide what to change.
Start by Listing What You Do Not Know
Before building anything, identify the assumptions supporting the concept. Do people experience the proposed problem? Can they understand the solution? Does the mechanism work? Can it be made consistently?
These are different questions and may require different prototypes. A polished appearance model can test visual expectations without proving mechanical performance.
Rank uncertainties by their consequences. If the entire concept depends on a folding mechanism working reliably, investigate that before selecting decorative finishes.
Also consider dependencies. There is little value refining the placement of controls on a form that may need major changes once the internal components are understood.
Ask a testable question, not “Is this a good product?”
“Can a first-time user assemble the stand without help?” gives you something specific to observe.
Choose the Prototype Around the Question
A sketch can explore proportions and alternative arrangements. A cardboard mockup can reveal scale and reach. A functional rig can test motion without resembling the final product.
A digital interface prototype may show how someone moves through screens, while a physical model reveals whether the device is comfortable to hold during that interaction.
More detail is not automatically better. A realistic finish can make participants assume the design is final, and it may distract the team from structural weaknesses.
Build only as much fidelity as the question requires. Increase realism when the unanswered issue depends on material behavior, accurate dimensions, or a convincing use experience.
| Question | Possible Test Model |
|---|---|
| Is the overall size practical? | Full-size cardboard or foam mockup. |
| Does the action sequence make sense? | Simple interactive or functional prototype. |
| Can parts fit together? | Dimensionally appropriate fit model. |
| Will the intended construction perform? | Representative materials and production-like samples. |
Define Success Before the Session
Write down what would support or challenge the concept. Otherwise, a team can reinterpret almost any reaction as encouraging.
For an assembly test, success might mean completing the task with all parts correctly positioned and without verbal assistance. For a handle, the question may concern access and control rather than appearance.
Avoid arbitrary thresholds presented as scientific proof. The appropriate criterion depends on the product, consequences of failure, and stage of development.
Record what the prototype cannot establish. A rough model may reveal confusion but cannot demonstrate long-term durability or compliance with requirements that need specialized evaluation.
Use Realistic Tasks and Relevant Participants
People test a product more meaningfully when they perform a task resembling its intended use. “Pack these items and carry the case” is more informative than “Do you like this case?”
Recruit participants whose experience and circumstances relate to the intended audience. Friends can help identify obvious issues, but their reactions should not automatically stand in for unfamiliar customers.
Reproduce relevant conditions where practical. A desktop organizer intended for a crowded workspace should not be evaluated only on a completely empty table.
Keep the task safe and appropriate to the prototype’s limitations. An unfinished model should not be asked to carry real-world loads or encounter conditions it was never designed to withstand.
Illustrative Test: A Foldable Desk Stand
A designer wants to know whether users can unfold and position a new stand without instructions. The first model includes the main hinges and support surfaces but no final finish.
Participants receive the folded stand and a clear task. The designer records opening attempts, incorrect orientations, questions, and whether the final position is stable within the model’s intended test conditions.
The session tests discoverability and setup. It does not prove that the final product will survive years of repeated use.
Observe Before You Explain
Designers often want to rescue participants immediately. A hesitation feels uncomfortable, especially when a small explanation could make the task proceed smoothly.
However, that hesitation may be the most valuable result. Actual owners will not have the designer beside them.
Let participants attempt the task before offering guidance. Ask neutral questions such as “What were you expecting?” rather than “Did the arrow help you find the latch?”
Separate observations from interpretations in your notes. “Turned the product over twice” is evidence. “Needs a larger logo” is a proposed response that still needs justification.
Track Problems in a Decision Log
A prototype session produces more than a list of comments. Organize findings by task, observed behavior, consequence, and possible cause.
Then identify the next action. Some findings justify an immediate correction. Others require a second test because several explanations remain plausible.
Distinguish frequent minor issues from rare but serious failures. Both can matter, but they may call for different priorities.
Keep positive findings too. If a particular shape consistently helps users orient the product, record that strength so it is not accidentally removed during later changes.
Change Deliberately and Test Again
When possible, connect each revision to a finding. A clearer lifting point should address observed opening difficulty rather than merely make the prototype look different.
Changing many unrelated features at once makes results harder to interpret. Sometimes a broad redesign is necessary, but document what changed and why.
Use comparable tasks in the next round. If the revised prototype receives a simpler task, an apparent improvement may reflect the testing conditions rather than the design.
Repeated testing should reduce important uncertainty. It should not become an endless search for unanimous approval or an excuse to avoid making decisions.
Bridge the Gap Between Prototype and Production
A hand-built sample may hide assembly labor that would be impractical at scale. A printed component may behave differently from the intended production material.
Review dimensions, tolerances, joining methods, finishes, and inspection needs with appropriate manufacturing specialists. Ask which prototype details are representative and which are temporary shortcuts.
Production-like samples and a limited pilot run can expose consistency issues that a single carefully assembled model cannot reveal.
Also test packaging, instructions, storage, and unpacking. A product’s first real interaction often begins before the owner touches the product itself.
Before Committing to Production
- Identify which important assumptions have supporting evidence.
- List unresolved questions and their consequences.
- Confirm what changed between prototype and intended production.
- Review manufacturing and assembly feasibility.
- Define appropriate quality checks and further evaluation.
A convincing prototype is useful only when the team understands what it proves. Appearance, function, usability, manufacturability, and demand require related but distinct evidence.
The strongest development process makes that evidence visible. Each model answers a question, each test informs a decision, and each revision brings the concept closer to a product that works beyond the presentation table.
A product’s shape is never independent of how it will be made. Material, process, assembly, and finish influence what a designer can build—and what people will experience.
A smooth enclosure, a flexible hinge, a thin metal panel, and a textured grip may look like styling decisions. Each also reflects physical properties and manufacturing choices.
Industrial design becomes stronger when these choices develop together. Selecting a material after completing the shape can create avoidable compromises. Choosing a process without understanding the intended experience can be equally limiting.
Begin with the Product’s Actual Demands
Before comparing materials, describe what the product must do. Consider loads, repeated movement, exposure, cleaning, weight, touch, appearance, and expected service life.
A desk accessory and an outdoor enclosure may share a similar silhouette while facing very different conditions. One may prioritize surface feel; the other may need to accommodate sunlight, moisture, and temperature changes.
Separate essential requirements from preferences. “Must remain stable during normal use” is different from “should feel visually light.” Both matter, but they guide decisions differently.
Also define the expected production quantity and how the product will be assembled. Those choices influence whether a promising construction is practical.
A Material Name Is Only the Starting Point
Labels such as plastic, aluminum, steel, or wood describe broad families. Different grades and constructions within each family can behave differently.
Strength and stiffness are not interchangeable. A component may resist breaking yet bend too much for its intended function. Another may feel rigid but respond poorly to a particular impact.
Weight also needs context. A lighter material may require thicker sections or additional structure, changing the final mass and dimensions.
Evaluate the complete part rather than assuming one material is universally stronger, lighter, or more premium than another. Geometry and processing help determine the actual result.
| Design Concern | Questions to Ask |
|---|---|
| Structure | How much bending, force, and repeated loading are expected? |
| Environment | What exposure, cleaning, and temperature conditions matter? |
| Experience | How should the surface feel, sound, and appear? |
| Production | Can the intended geometry be made and inspected consistently? |
Manufacturing Methods Encourage Different Shapes
A process is not simply a way to reproduce any shape imagined on a screen. Each method has characteristic strengths and constraints.
Forming sheet material naturally supports folded panels and continuous surfaces. Machining removes material, so tool access influences which features are straightforward to create.
Molding relies on tooling and material behavior. Part release, section changes, and the arrangement of features affect how a design can be produced.
Additive manufacturing builds a part progressively and can enable geometries that would be awkward through other methods. However, build orientation, surface quality, and post-processing still require attention.
The useful question is not “Which process is best?” It is “Which process supports this product’s requirements and production context?”
Production Quantity Changes the Economics
Some processes require significant preparation or tooling before the first usable part is produced. Others can make small quantities with less dedicated setup but more work per item.
This changes how a concept should be evaluated. A method suitable for ten display samples may not suit thousands of regularly sold products.
Conversely, a production process optimized for large quantities may make little sense for a limited specialist product.
Compare the full path: preparation, material, processing, finishing, assembly, inspection, and expected changes. A low quoted part price does not automatically mean the complete product is inexpensive to make.
The manufacturing decision should support the business reality, not an imagined future volume that the project has not established.
Assembly Is Part of the Design
A component may be easy to manufacture and difficult to assemble. Hidden fasteners, unclear orientation, and awkward access can create repeated problems.
Consider how a person or machine will hold each part, align it, join it, and confirm that it is correctly positioned.
Reducing unnecessary part variety can simplify assembly, but combining parts is not always beneficial. An integrated component may be harder to repair or more expensive to replace.
Think about disassembly as well. A joint selected only for a seamless appearance may complicate maintenance. The right balance depends on what the product needs over its life.
Tolerances Determine How Parts Work Together
Manufactured parts vary. A dimension on a drawing is a target accompanied by allowable variation, not a promise that every physical part will be mathematically identical.
When several components fit together, their variations interact. A cover, latch, and housing might each appear acceptable individually but combine into a poor fit.
Designers should identify which relationships are functionally important. Excessively tight requirements everywhere can increase complexity without improving the user experience.
Work with manufacturing and engineering specialists to define appropriate dimensions and verification methods. A beautifully aligned prototype assembled by hand does not prove that routine production will achieve the same result.
Surface Finish Changes Both Appearance and Use
Color, texture, gloss, and coating influence how a product looks, but they also affect fingerprints, cleaning, grip, and visible wear.
A highly polished surface may communicate one visual quality while making scratches more noticeable. A textured finish may disguise marks but interact differently with cleaning and tactile expectations.
Evaluate finishes on representative samples rather than relying only on digital renderings. Lighting and screen settings can make a finish look different from the physical result.
Also check what happens where parts meet. A coating or finish can change the way fitted surfaces interact, so it should not be treated as an entirely separate final decoration.
Illustrative Example: Designing a Tabletop Lamp
A folded metal shade, molded polymer enclosure, and wooden housing can each support a different appearance and construction approach.
The decision affects weight distribution, joining, finish, internal access, and the available shapes. Requirements involving electrical components and heat also need appropriate technical evaluation.
The design becomes coherent when those relationships are resolved together instead of treating the outside form as independent from everything inside it.
Avoid Simplistic Sustainability Claims
No material is automatically the most sustainable in every application. Quantity, manufacturing, transportation, durability, maintenance, and end-of-life conditions all influence the picture.
Using less material can help, but not if it makes the product fail earlier or creates additional replacements. A durable product can still be difficult to repair if its construction prevents access.
Recycled content and recyclability are also different claims. One concerns the origin of material; the other concerns what may happen after use.
Make specific, supportable statements rather than relying on a green color palette or a vague label. Environmental intentions need evidence just as functional claims do.
Test the Important Details in Representative Form
Early prototypes can answer questions about size and layout, but later decisions may require samples using the intended materials, finishes, and processes.
Check the relationships that matter: fit, movement, appearance, handling, assembly, and performance under appropriate conditions.
Document which changes are acceptable and which would undermine the product. This helps preserve the design’s purpose when suppliers suggest alternatives.
Industrial design works best when material, manufacturing, and user experience develop as one conversation. A successful object does not merely look possible—it is built around a realistic understanding of how it will be made, used, maintained, and eventually replaced or recovered.
A smaller package is not an improvement if the product arrives damaged. Better packaging removes unnecessary material while preserving the protection the journey actually requires.
The strongest approach considers the product, transport route, packing process, customer experience, and disposal options together.
Packaging has several jobs. It can prevent movement, protect vulnerable surfaces, carry information, support storage, and help a customer understand what they received.
Waste appears when those jobs are poorly matched to the design: oversized boxes, duplicated layers, unnecessary inserts, or materials that complicate disposal without providing a clear benefit.
Map the Journey Before Choosing the Box
A product handed directly to a customer faces a different journey from one traveling through warehouses, sorting systems, delivery vehicles, and doorstep handling.
List the actual stages. Include packing, stacking, transport, storage, returns, and unpacking. Identify where the package may experience impact, compression, vibration, moisture, or rubbing.
These are conditions to investigate, not reasons to add every possible protective layer. The goal is to understand which hazards matter for the intended distribution system.
Also consider whether the packaging travels alone or inside another container. Duplicated protection can appear when a retail package is placed inside a shipping box without reviewing how their functions overlap.
Identify What Is Actually Vulnerable
Products do not all fail in the same way. One may resist impact but scratch easily. Another may have a strong main body and one fragile projection.
Look for exposed corners, moving components, delicate finishes, and parts that can strike one another during transport.
Design protection around those vulnerabilities. Supporting the right locations may be more useful than surrounding every surface with the same amount of cushioning.
Keep product condition separate from package appearance. A scuffed outer box and a damaged product are different outcomes, although presentation requirements may make both relevant.
Illustrative Example: A Small Desk Organizer
The organizer’s main body is sturdy, but a removable tray can move during shipping and rub against the finished surface.
A well-positioned restraint or separator may address the problem more directly than filling a large box with loose cushioning. The proposed change still needs testing through the intended journey.
Control Movement Without Creating New Damage
Excess movement can let a product repeatedly strike the package or neighboring components. Too much pressure can also create problems by concentrating force on a vulnerable area.
The objective is controlled support, not simply a tight fit. Allow for realistic product and packaging variation rather than designing around one perfect sample.
Separate components that could scratch or collide. Check whether protective surfaces themselves can leave marks, transfer color, or trap debris.
Review the complete assembly. A clever insert that works only when an experienced designer positions it precisely may not perform consistently during routine packing.
Right-Size the Package as a System
Oversized packaging can increase material use, storage space, and the need for void fill. Yet reducing dimensions without reviewing protection can simply move the problem elsewhere.
Start with the product’s required orientation and support. Then determine the space needed for protective features, accessories, instructions, and closure.
Review several products together if they share a packaging system. Standardization can simplify operations, but one universal box may create substantial empty space for smaller items.
The practical solution may be a limited family of sizes rather than either extreme: one box for everything or a unique construction for every variation.
| Potential Change | What to Verify |
|---|---|
| Smaller outer dimensions | Protection and packing access remain adequate. |
| Less cushioning | The product still withstands the relevant journey. |
| Simpler material mix | Required performance and practical recovery remain suitable. |
| Fewer inserts | Parts remain restrained and instructions stay clear. |
Choose Materials for Their Role
A material should earn its place through a clear function. Corrugated board may provide structure, a separator may prevent rubbing, and a barrier may address a specific exposure requirement.
Do not assume that replacing one material with another automatically improves the full package. A substitute may require more volume, extra components, or different handling.
Compare actual constructions rather than broad categories such as paper versus plastic. Thickness, form, coatings, joining, and distribution conditions affect the result.
Ask suppliers about realistic options, but define the performance need first. Otherwise, a material proposal can become the design direction before the underlying problem has been established.
Reduce the Work Required to Pack It Correctly
Packaging waste is not limited to what the customer throws away. Incorrect assembly, damaged components, packing mistakes, and rework can also consume material.
Make the packing sequence clear. Parts should have an understandable orientation, and necessary restraints should be easy to place consistently.
Observe someone unfamiliar with the design packing a sample. Look for repeated adjustments, hidden steps, and decisions that rely on unwritten knowledge.
A simpler assembly can improve consistency while reducing unnecessary handling. However, verify that simplification preserves the protective features rather than removing them for speed alone.
Test Protection Before Claiming Success
Evaluate the package against the conditions relevant to its distribution route. Appropriate testing may examine impact, vibration, compression, or environmental exposure.
A casual drop of one sample cannot establish that a design will perform across all shipments. Product variation, packing consistency, orientation, and accumulated exposure matter.
Use suitable technical expertise to select a meaningful evaluation plan. Record the package version, product condition, assembly method, and observed results.
After a failure, investigate the mechanism. A cracked corner, displaced accessory, and scratched surface may require different changes. Adding more cushioning everywhere can conceal rather than solve the cause.
Keep the complete outcome in view: A package that uses less material but causes more product damage may create additional returns, replacement shipments, and discarded products.
Make Unpacking and Disposal Understandable
The customer should be able to identify where to open the package and remove the product without unnecessary struggle.
Unclear closures can lead people to pull against protected parts or use tools in ways the design did not anticipate. Test the first opening, not just the packing process.
For disposal, identify materials and separation steps clearly. Guidance should reflect the actual construction and the markets where the product is sold.
A technically recyclable material may not be accepted in every local collection system. Avoid universal promises when recovery depends on regional infrastructure or special handling.
Use Environmental Claims Carefully
Recycled content, recyclability, reuse, and compostability describe different things. None should be used as a substitute for explaining what the package actually contains and how it should be handled.
Be specific about comparisons. If a revised package uses less material by weight, define the earlier version and compare like-for-like configurations.
Material reduction alone does not establish a complete environmental advantage. Protection, transport, manufacturing, recovery, and product damage can influence the wider outcome.
Likewise, a reusable package needs a realistic reuse purpose. An elaborate box that customers rarely keep should not rely on imagined future use to justify unnecessary construction.
A Final Review Before Release
- Every component has a defined protective or informational purpose.
- The product remains secure without harmful pressure.
- The packing sequence is understandable and repeatable.
- Evaluation reflects the intended distribution conditions.
- Opening instructions are easy to find and follow.
- Disposal guidance and environmental claims are specific.
Effective packaging balances restraint with reliability. It removes material that does not contribute while preserving the features that prevent real damage.
The best result is not necessarily the thinnest box or the most impressive unboxing experience. It is a well-matched system that delivers the product intact, works consistently, and leaves the customer with fewer unnecessary materials and clearer choices.